How to: build a 3x3m pergola
If you are looking for a way to enhance the natural beauty of your garden, installing a pergola could be one of your options.
We have made it easier for you to build your own pergola by putting a kits together with all the timber, wafer head screws and fencing clips you require. The only additional equipment you will require is how you secure the pergola in the ground, whether you need post mix or bolt down post supports, as well as a couple of screws.
Here is a step-by-step guide to creating your own 3x3m pergola. If you choose to buy one of our other size options, the process is the same but with different lengths of timber.
Materials needed:
4 x 100×100 x2400mm Eased edged posts
4 x 47x150x3000mm Sawn and treated timber
6 x 47x100x3600mm Sawn and treated timber
1 x 47x100x4800mm Sawn and treated timber (cut into 4 x 600mm lengths)
Step one: Prepare the area
Before constructing the pergola, you need to prepare the area you want to build and ensure you have all additional equipment and fixings you require:
- a drill,
- 25mm screws (72 in total)
- 80mm screws (8 in total)
- a spirit level,
- and a tape measure.
Depending on where you build your pergola will depend what you will require to secure the posts into the ground:
- Securing direct into the ground:
- Dig four 450-600mm holes where the posts are going to go
- Use post mix to secure these into the ground
- Each post will require one bag of post mix
- Securing to a flat hard surface eg patio:
- If securing into concrete these will be secured with M8X100 thunder bolts
- If securing into timber these will be secured with M8X100 coach screws
Step two: Building the frame
To make it easier and not have to work at height:
- Lay out one of the 47x150x3000mm sawn and treated timber,
- At either end place two eased edge posts
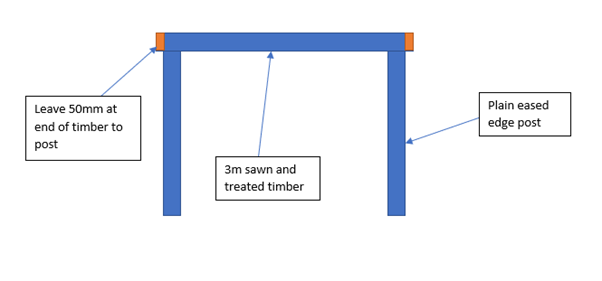
- line up so square to the of the top timber and top of the post
- leave a 47mm gap at each end of the timber (this is the thickness of the timber)
- Use two wafer head screws to fix the post to the timber.
Repeat this process with the other two posts and another piece of the 47x150x3000mm sawn and treated timber.
- Fit six panel clips on each length of timber, we have evenly spaced these across the top of the timber you can obviously decide where you place these and whether you want more or less
- The first and last panel clip on each side is at 47mm from the end of the timber (where the post is secured)
- Then each clip is centrally spaced at 570mm
- Panel clips can be secured using 25mm screws
- To ensure all clips are in the same place on each timber you can lay the timbers on top of each other, see image below


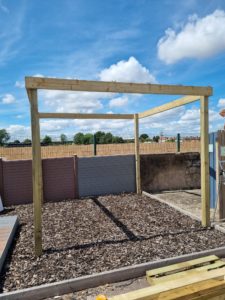
Step three: Secure the frame into the ground
Lift both sides of the frame and either:
- Insert into holes and secure with post mix
- Ensure the hole is 450mm-600mm deep (you may want longer posts for this)
- Insert the post into bolt down supports securing with two M8X75 coach screws
- Secure the bolt down support onto concrete using M6X100 thunderbolts or into timber using M8X100 coach screws
Step four: completing the frame
Once your posts are secure in the ground it is now time to complete the frame.
Square off the top of the frame. The 47x150x3000mm timber should fit square onto the end of the posts. Secure this timber using two wafer head screws on each post.
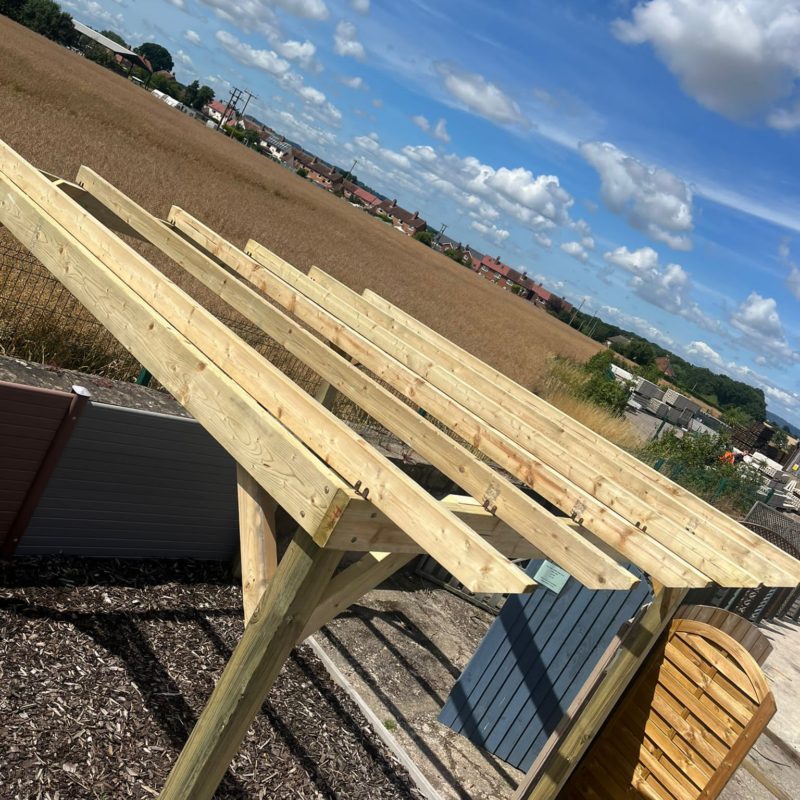
Step five: secure roofing timbers
Place the 47x100x3600mm sawn and treated timber into the panel clips.
Ensure all timbers have the same overhang approx. 300mm both ends.
Secure each timber into the panel clips using 25mm screws.
Step six: complete the look
To complete the look and make the structure sturdier you need to attach the corner braces, this is from the 47x100x4800mm timber cut into four lengths (in our pergola kit these are already cut to size).
In each corner attach one length 600mm, place diagonally to the top frame and post.
Secure these corner braces with 80mm screws. One into the post and the other into the top of frame.


If you require any further information, visit us in store Park Timber, Roden, TF6 6BJ or call us on 01952 770779.